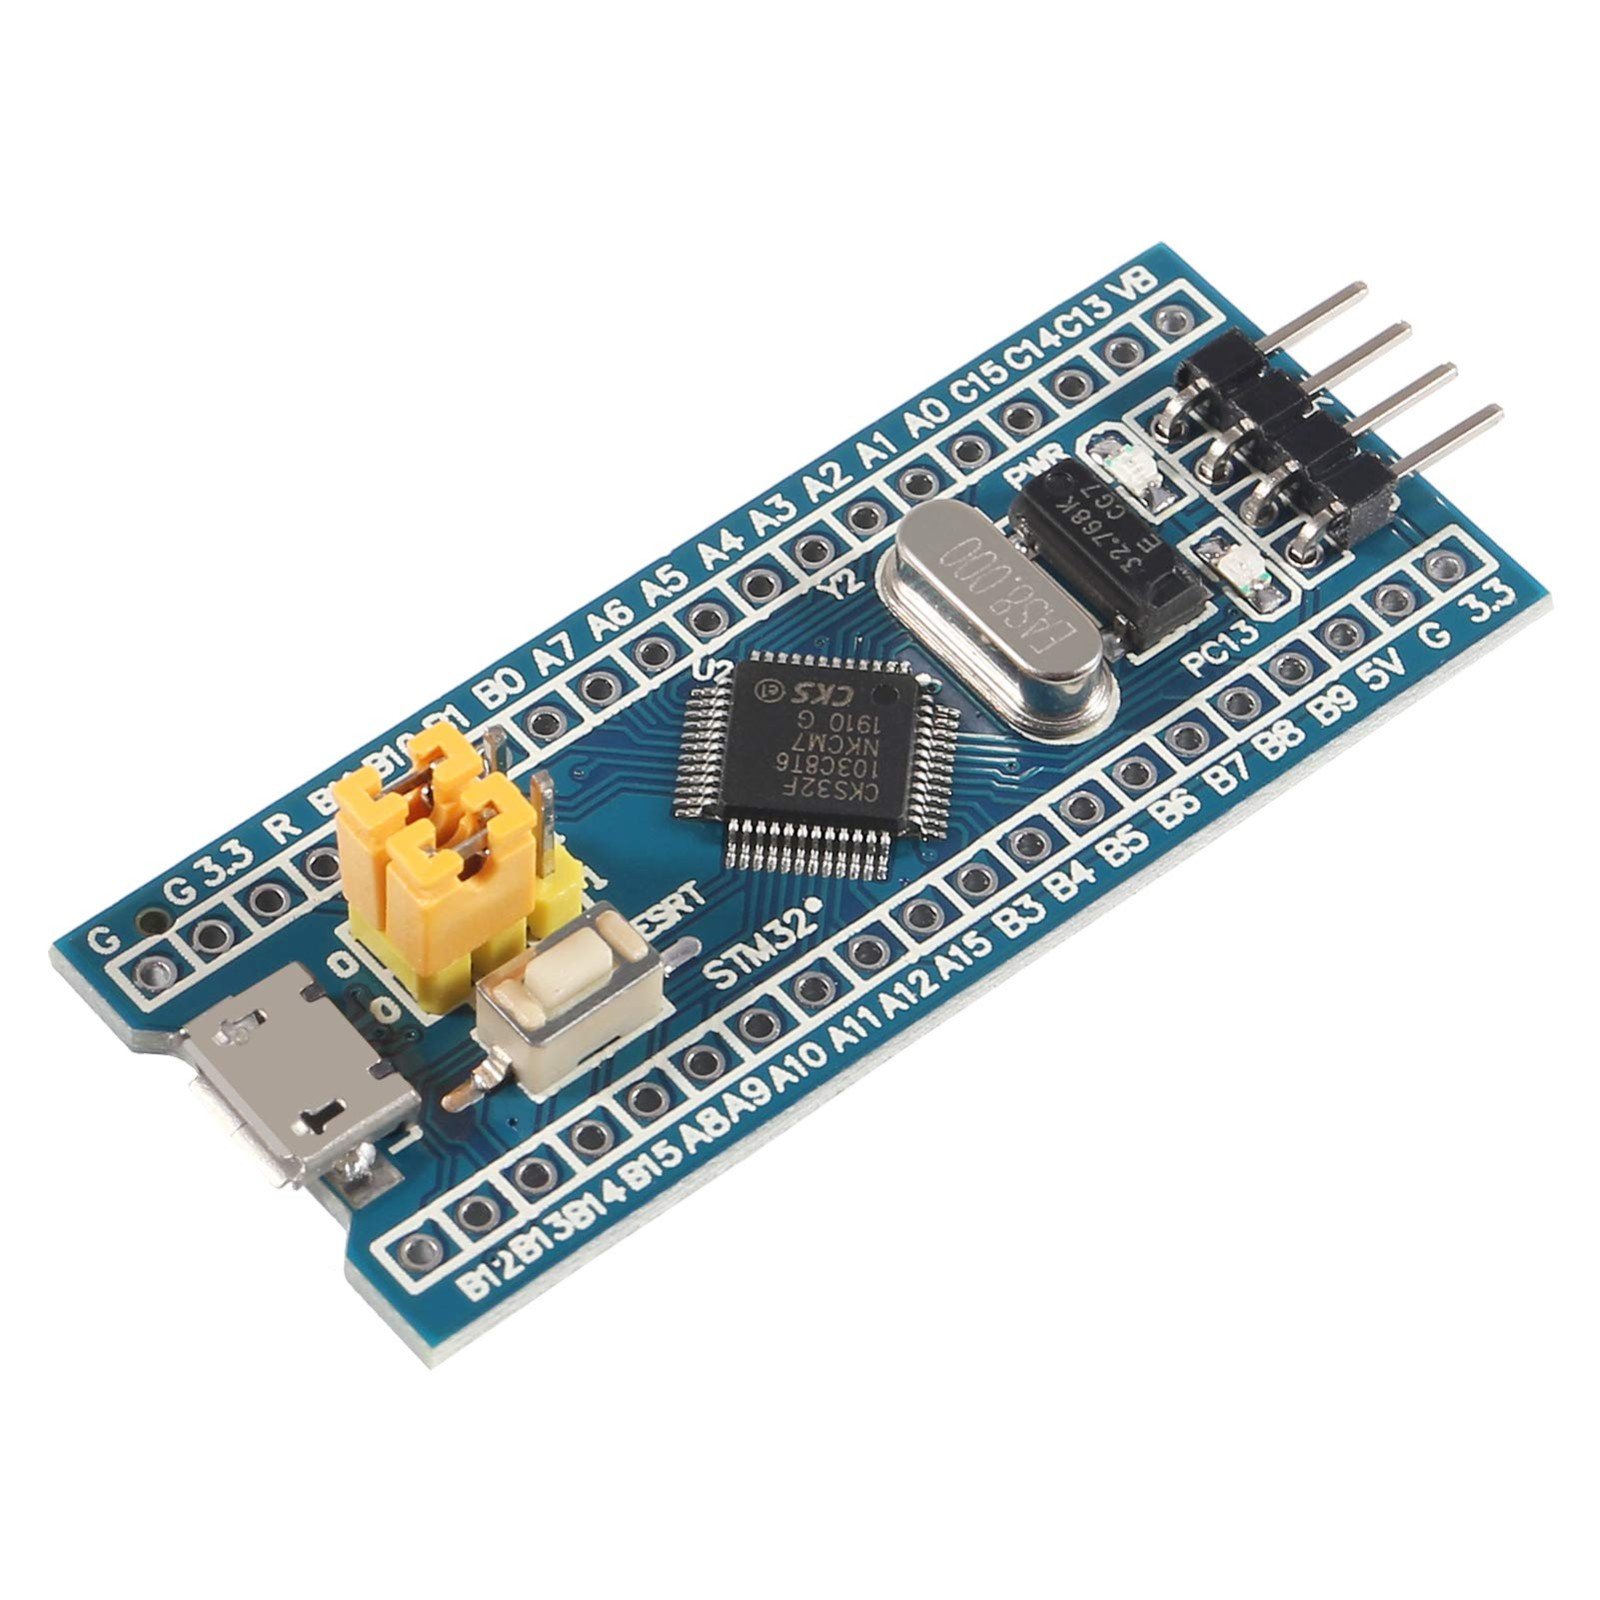


STM 32 103C8T6 WITH BOARD
The unparalleled range of STM32 microcontrollers, based on an industry-standard core, comes with a vast choice of tools and software to support project development, making this family of products ideal for both small projects and end-to-end platforms. Read more about the benefits of Arm Cortex-M processor cores.
₹ 163 ₹199
199


The STM32F103C8T6 is a popular microcontroller from STMicroelectronics' STM32 series, part of the ARM Cortex-M3 family. It's commonly used in development boards such as the "Blue Pill," which is a small and affordable board featuring this microcontroller. Below is a comprehensive guide to getting started with the STM32F103C8T6 and its associated development board.
Overview of STM32F103C8T6
- Core: ARM Cortex-M3
- Clock Speed: Up to 72 MHz
- Flash Memory: 64 KB
- RAM: 20 KB
- GPIO Pins: 37
- Analog-to-Digital Converter (ADC): 12-bit, up to 10 channels
- Timers: Several 16-bit timers
- Communication Interfaces: USART, SPI, I2C, CAN
- Peripheral Interfaces: External interrupts, PWM, DAC (limited)
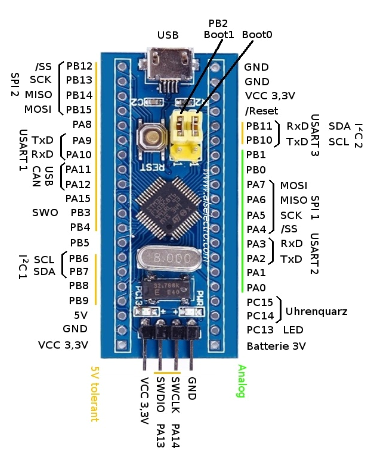
Development Board: Blue Pill
The Blue Pill is a development board featuring the STM32F103C8T6 microcontroller. It provides easy access to the microcontroller’s pins and peripherals and is suitable for a wide range of projects.
Key Features
- USB Interface: For programming and debugging.
- Power Supply: Can be powered via USB or external 3.3V.
- IO Pins: Accessible through headers for prototyping.
- On-Board LEDs: Often used for debugging and status indication.
Getting Started
1. Hardware Setup
- Connect the Board: Use a USB-to-Serial adapter or ST-Link V2 for programming and debugging.
- Power Supply: Ensure the board is powered correctly, either through USB or an external 3.3V source.
2. Software Tools
To program and develop for the STM32F103C8T6, you’ll need several tools:
- STM32CubeIDE: Integrated development environment from STMicroelectronics.
- STM32CubeMX: Configuration tool for initializing peripherals and generating initialization code.
- ST-Link Utility: For programming and debugging (if using ST-Link).
3. Setting Up the Development Environment
-
Install STM32CubeIDE:
- Download and install STM32CubeIDE from the STMicroelectronics website.
- It includes STM32CubeMX for configuration and code generation.
-
Install STM32CubeMX:
- Optionally, you can install STM32CubeMX separately if you prefer to use it independently from STM32CubeIDE.
-
Install Drivers:
- Install drivers for ST-Link or any USB-to-Serial adapters you are using.
4. Creating a Project
-
Open STM32CubeIDE:
- Launch STM32CubeIDE and create a new STM32 project.
-
Select the Microcontroller:
- Choose "STM32F103C8T6" or "Blue Pill" from the list of microcontrollers.
-
Configure Peripherals:
- Use STM32CubeMX to configure the microcontroller’s peripherals, such as GPIO, ADC, and communication interfaces.
- Generate initialization code for your configuration.
-
Write Code:
- Write your application code in STM32CubeIDE, leveraging the HAL (Hardware Abstraction Layer) or LL (Low Layer) libraries.
-
Compile and Upload:
- Build the project and upload it to the board using the ST-Link programmer/debugger.
Example: Blinking an LED
Here’s a simple example of how to blink an LED connected to GPIO pin PC13:
1. Configure GPIO Pin in STM32CubeMX:
- Set PC13 as a "GPIO_Output" pin.
2. Generate Code and Open Project in STM32CubeIDE:
- STM32CubeMX will generate initialization code for the configured peripherals.
0 Reviews For this Product
Related Products


.jpg&width=225&quality=80)
